


A Brief Guide To Terrazzo

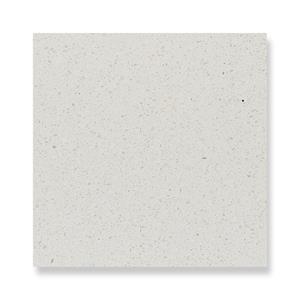
Terrazzo, derived from the Latin word "terra" meaning ground, exudes an artisanal charm in home interiors. This composite material combines marble, granite, glass, or quartz chips set into cement. Originating from Egyptian mosaics, it gained popularity in 16th century Italy as a way to utilize leftover stone fragments. Terrazzo is either hand-poured or precast into blocks that are later cut to fit.
Favored in high-traffic areas such as bars and lobbies in restaurants and hotels, terrazzo's durability also makes it ideal for residential settings. It is commonly used for floors, walls, and accent pieces like tables, backsplashes, and outdoor patio surfaces. Available in various colors and designs, terrazzo can be purchased as ready-made tiles. When properly sealed, it withstands water and can be applied in bathrooms and kitchens.
Terrazzo offers a blend of durability, aesthetics, and affordability. Often less expensive than granite and marble, it presents an eye-catching alternative without straining budgets.
Terrazzo Tiles Installation
For large surfaces and intricate designs, hiring a professional terrazzo installer ensures the job is executed flawlessly. However, for those who enjoy hands-on projects, installing terrazzo tiles can be a gratifying endeavor. Below are basic guidelines to assist you in installing terrazzo flooring:
1. Measure the Area:
Begin by measuring the space where you intend to install terrazzo tiles. Calculate the area by multiplying the length and width of the space. Purchase enough tiles to cover the area, with a surplus to accommodate cuts or design preferences.
2. Prepare the Surface:
Remove any existing flooring and assess the surface. If necessary, use a leveling compound to ensure a flat and even base. The surface should be clean and smooth to facilitate the installation of terrazzo flooring.
3. Adhere the Tiles:
Apply adhesive to the prepared surface and carefully lay the terrazzo tiles. Ensure they are placed neatly and securely.
4. Complete the Terrazzo Flooring:
Once the tiles are in position, firmly press them down to set them properly. Continue this process until the terrazzo flooring covers the desired area. Allow the installation to set for two to three days.
5. Grouting and Sealing:
After the tiles have settled, grout the joints and fill in any gaps between the tiles. Finally, apply a water-based or permanent sealer to coat and seal the terrazzo floor, enhancing its durability and appearance.
Is Terrazzo Flooring Worth It?
Terrazzo is celebrated for its exceptional value relative to its price, often creating a lasting first impression in any space. However, there are some considerations to keep in mind:
Insulation and Comfort:
Terrazzo does not retain heat well, which can result in colder indoor temperatures during winter months.
Longevity and Commitment:
Terrazzo is renowned for its durability and lifespan, designed to endure for generations. Therefore, it's essential to ensure you genuinely appreciate its aesthetic and functionality before committing. Changing terrazzo can be time-consuming and costly, whether it involves removal or laying new flooring on top.
Testing the Waters:
If uncertain about committing to terrazzo permanently, consider installing it in a small area first to gauge your satisfaction with the material and its upkeep.
By carefully weighing these factors, you can make an informed decision about whether terrazzo is the right choice for your home or project.